Lawn mowers are undeniably a hugely important tool for the gardener. Whether you’re a casual spot of gardening type person, or a full blown green fingered fanatic, the lawn mower is a pretty essential part of the gardening routine!
Keeping your lawn mower blades sharp is so important! Often people don’t even look at how blunt their blades are, but you really run the risk of yanking your lawn instead of a nice clean slice, which is not only nicer but healthier for your lawn as well. A sharp blade keeps your mower running in tip top condition and will mean less effort for you in the long run. I’m going to give you a few of my favourite tips on keeping your blade extra sharp, and all from the comfort of your own garden.
A lot of people probably are wondering whether you can safely sharpen the blade on your own lawnmower. The answer is “YES!” And you’re probably now wondering how to do it? Well keep on reading and you will find out how.
Firstly you must make sure the mower is not attached to the mains! It might sound obvious, but better safe than sorry!
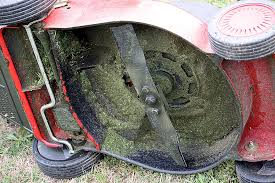
So, very simply, remove the blade by unscrewing the nut that attaches it to the motor. Remove any ruse with a steel brush or steel wool. This is easy to acquire at any hardware or gardening store. Give it a good old brush with some elbow grease, till the orangey colour has gone.
Then you’re going to need to get hold of a clamp or a vice. Most DIYers will have one of these in a shed, but if not, don’t be afraid to pop over and ask a friendly neighbour! Clamp the blade in a vice, or to the edge of a solid work surface. Now were going to file the blade. Run the file along the cutting edge, thats the narrower sharper edge, trying to follow the same angle on the blade.
 In some cases the blade can be badly damaged. This could be from long-term use, or from trying to cut through tougher things than your mower can handle, or from kicking up rocks or wood getting jammed. If it is badly damaged you may need to use a bench-grinder or have it professionally sharpened, which shouldn’t be too expensive if you shop around. (again just pop down to your local hardware store and ask around there)
If you do use a power grinder sharpen your blade, make sure the blade doesn’t over heat. This can weaken the blade, so be sure to dip the blade in water frequently during the sharpening process.
To remove any nicks or grooves you need to run the blade along the grinding wheel. Then hold the blade at the proper angle (the angle already on the blade) and grind the length of the blade until its sharp.
Remember, you want your blade to be about as sharp as a butter knife, it shouldn’t be as sharp as a razor blade. Not only do you risk cutting yourself, but the blade will curl in places where it hits little pebbles or wood. There is no need for it to be this sharp as the speed and angle will cut the grass perfectly at this sharpness.
There is a “lazy” way of sharpening your blade which would be to use coarse grit sandpaper. If you don’t have large nicks in your blades this will do the trick as a quick fix, and will clean up the edge nicely.
To check that the blade is balanced you simply need to balance the blade from the counterpoint on a Blade Balancer, a very inexpensive tool, or a nail. If the blade isn’t balanced, you can remove some of the material from the heavier side, but make sure not to remove it from the cutting edge.
 Now that your blade is all nice a sharp, you can re-attach it to your lawn mower with the nut.
The more you sharpen your blade, the quicker and easier the task will be. If you frequently use your mower, I would recommend sharpening your blade every couple of months, but you can be the best judge of that. If you notice that your mower isn’t cutting as finely, maybe its time for a sharpening!
A few points to remember! –
- Butter knife, not razor blade
- Don’t change the over-all angle of the blade! (the manufacturer probably knows best!)
- Make sure you’re balanced, this can harm the mower permanently
- Curved mulching blades might be harder to sharpen, you could think about simply replacing it
- Replacement blades can be found quickly and easily, don’t be afraid to just replace it!
So, now that you know how to sharpen your lawn mower blades, you can easily do it yourself! No more chopping and hacking at that lawn with a blunt blade, the 15 minutes it took for you to do that has surely taken a lot of the stress and sweat out of your lawn mowing!
Read more about How To Sharpen Lawn Mower Blades – Your Ultimate Guide on The Best Mowers UK.
 The first ever lawn mower was invented by a man called Edwin Budding in 1830. In a town called Thrupp, in Gloucestershire. They were initially invented to cut the grass on sports grounds and stately gardens. Up until then they used a scythe, but the lawn mower was granted a British patent on August 31st, 1830.
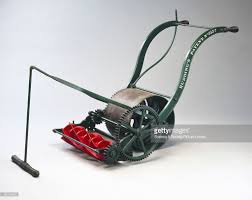
 The history of the lawn mower is extensive, and I could really go on for days! But you can imagine how the advances in technology has brought us to where we are today, with super snazzy gadgets such as the ride-on mower, hover mowers, and even robotic mowers.
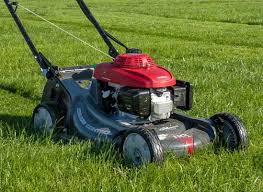 Lawn mowers are also responsible for a fair amount of environmental damage, as many things are with the advance of technology and the amount of power we need. A study has shown that some mowers are capable of producing the same amount of pollution in one hour, as driving a vehicle for 650km! Another report claims that the amount of pollution from a lawn mower can be up to four times the amount from a car per hour. Thats pretty bad… but luckily most of us only need to mow the lawn a minimum of once a week, and we’re not using our ride on lawn mowers to get to work every day!
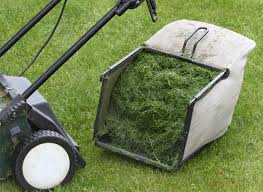 continuous raking, and collecting, and composting and god knows what else you struggle with when mowing, for your lawn to be less green and vibrant. Whats that all about?
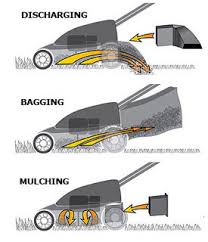 It keeps your garden healthy – by reducing evaporation of moisture from the lawn, it enhances the health and growth of the turf and will keep the soil temperature much cooler. – Mulched clippings can provide up to 25% of fertiliser needed for an average lawn, with 85% water and 5% nitrogen, its full of nutrients. – Turf specialist Dr. Keith J Karnok says “Its a good idea to mulch grass clippings when possible, providing the mulched clippings do not interfere with the use of appearance of the turf area”
 Some people believe that mulching grass clippings can lead to the build up of thatch. Thatch is when a layer of roots stems and clippings build up faster than they decompose. It can go brown and be unsightly. However Dr Karnok says that “Contrary to popular belief, mulching grass clippings does not contribute to the buildup of thatch, In general, proper mowing, irrigation and proper fertilisation, and in particular avoiding over fertilisation will help keep thatch accumulation down.”
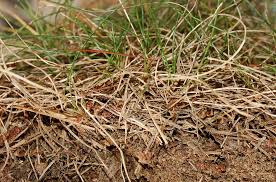 For best result I stick to a 2/3 system. This means you never let your lawn grow more than 1/3 longer than your ideal height. As soon as the grass reaches that height you cut away the top 1/3 away! I’ve found this system allows for better breakdown of the grass clippings and ultimately a nicer mulch.
 If you’re a nature lover, you can choose trees that have berries, to attract birds and provide perches and a place to nest for birds and little animals! Or if you’re looking to grow some things at home, for a nice harvest, you could go for apple, pear or cherry trees.
 Snow gum (Eucalyptus pauciflora)
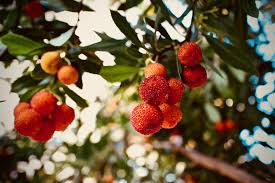 Strawberry Tree (Arburtus unedo)
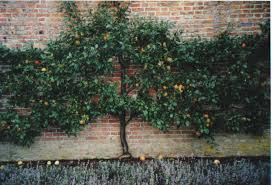
 However it is undeniably a lovely feeling to be able to sit in your garden with friends, or look out at something pleasant when you look outside. So, maybe we can come up with some low maintenance ways to make your outside space work for you, and not the other way round!
 Lets talk a bit more about the perfect plants to ensure that you can have an easy-to-keep, lovely-to-look-at garden.
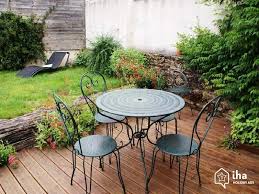 The best kinds of plants to go for would be evergreen, like lavender, holly and euonymus. Lavender has lovely purple flowers, that can add a delicate splash of colour to your garden, and requires minimal work. For seasonal colour you can put in planters with flowering plants in and use them as you would cut flowers in the house. Ready planted pots are your best friend here, you can just bring them straight home from the store and pop them where you fancy and you’re good to go! You can also get some gorgeous big tropical looking palms and big luscious leafy plants, so head to the outdoor section of the garden centre, and don’t be afraid to ask for advice!
 At the moment i’m really loving the accessories in my garden. Some agricultural supplies such as a trough or feeders used as planters are adding a really nice modern and architectural feel to my garden. I think if you start treating your garden as another room, and decorate it as if it were inside, then your ideas will start to flow. Avoid painting as this will need to be done again and again as it is weathered by the elements. I also recently put in a gorgeous garden shelving unit outside and it is a lovely place to keep gardening tools, decorative items, and more little plant pots on.
 For me the most satisfying part of having a lovely low maintenance garden is to just kick off my shoes and relax! In style… There are some amazing ways to achieve this, with something like a daybed, swing seats, or hanging pods, to add a bit of luxury and a lot of comfort!
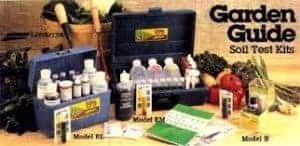
 Once your soil is dry, its time to start your test. Crush the soil and sift it through a sifter or a screen to get an even texture. Make sure to remove any debris or rocks.
 Now onto the nitrogen testing, take a clean test tube and fill to line 7 with the nitrogen extracting solution. We’re going to add 3 scoops of soil again. Shake gently for one minute. Remove the cap and let it settle. Once its settled use a clean pipette to move the clear liquid to another clean test tube up to line 3, be careful not pull up any soil. Add 2 x 0.25 gram scoops of the nitrogen indicator powder. Pop the cap on, mix gently and wait for a pink colour to develop. The nitrogen test indicates whether there are traces of nitrogen in the soil. Nitrogen is an important nutrient so it is good to have at least traces show up in the test.
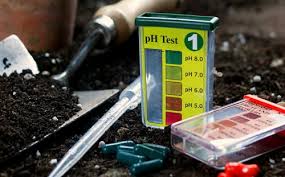
 The last nutrient I’m going to test is the potassium. You know the drill by now. Fill a clean test tube to line 7 with the potassium extracting solution. This time I’m going add four scoops, and then shake vigorously, allow it to settle and move it to a clean test tube with a pipette. Add a potassium indicator tablet and mix gently and until the tablet dissolves and the liquid turns purple. Add the potassium solution one drop at a time. Mix in-between the drops, and keep track of how many you’ve put in. Stop adding drops when the liquid goes form purple to blue. I added 24 drops to get the potassium colour light blue, which means I’m pretty low on potassium.