Miyerkules, Pebrero 24, 2021

How Often Should Riding Mower Blades Be Sharpened? Find Out Here!

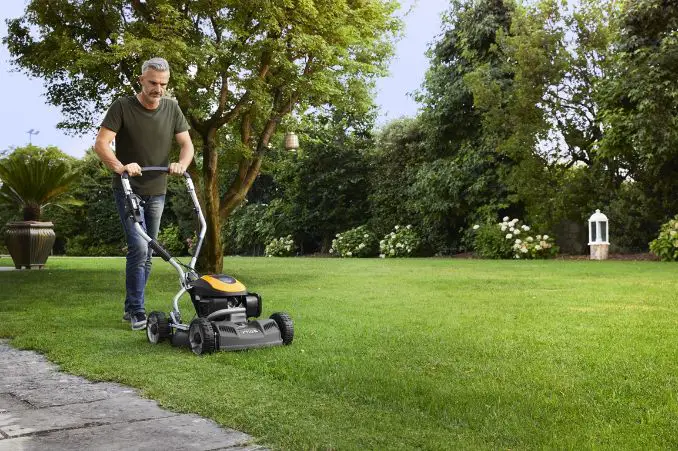
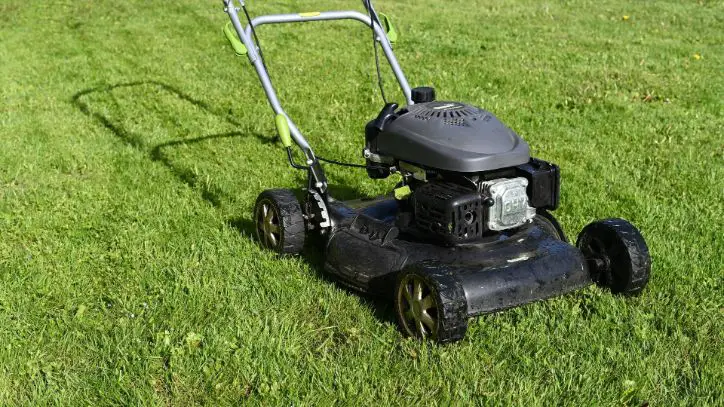
When To Sharpen Your Riding Mowers Blades

Keeping your riding mowers blades sharp is the best way to get a clean and accurate cut on your lawn, by cutting your lawn with dull blades on your riding mower, you could be ruining the health of your lawn.

However, figuring out when it is the right time to sharpen the blades of your riding mower can be difficult as this depends on how often your mow and the size of the lawn you are cutting.

On average, for people who are just maintaining there garden, once or twice a season is sufficient for your riding mower, if you are after a more professional cut however and use your mower a lot, every 25 hours of grass cutting time could be more suitable.

To get a better idea of what signs you should be looking out for and how to sharpen them, we have put a little guide together below that will cover everything you need to know about sharpening your mower's blades.

Why Should I Sharpen My Riding Mowers Blades

Using a mower with dull blades can cause havoc on the health of your lawn and leave it with an uneven cut or a yellow tinge to the end of your grass due to it being torn and not cut.

This will also look messy aesthetically and is not the look to be going for if you are after that professional finish on your lawn.

Signs You Need To Sharpen Your Riding Mowers Blades

From torn grass to worn-down blades, if your not sure when you should be sharpening your riding mowers blades there's a couple of indicators you can be looking out for which will show you your blades need sharpening.

We have listed a few signs below to be aware of -

The Blade Is In Poor Condition

When your blade has been taking a battering from rocks and stones, over time it will become more brittle and blunt, visually inspecting your blade to see if the cutting edge is worn down or uneven can mean the blades of your riding mower need sharpening.

If your mowers blades are completely damaged then they will need replacing straight away instead of sharpening.

Uneven Cut

Going over the same area of your lawn to get an even cut is the sign of a blade that needs sharpening. Mowing a patch of your lawn once should give an even and quick cut and you shouldn't have to find yourself going over the same area twice to reach a smooth finish.

Torn Grass

One of the last best ways to determine if your riding mowers blades need sharpening is by inspecting the grass. If you can see after mowing your grass has a yellow tinge to its tips and looks torn rather than sliced, it's time to sharpen your lawnmower's blades.

Factors To Consider When Sharpening Your Riding Mowers Blades

Now you know the indicators that can tell you when your riding mowers blades need sharpening, you should additionally consider some other factors that can affect how often you need to be sharpening your mowers blades.

Lawn Size

The size of the lawn you are mowing can determine how quickly your blades will need sharpening, especially if this grass has lots of stones and debris that can wear your blades down.

For example, a large lawn with obstacles such as tree roots will tell you that your blades need sharpening much more often than a clear small backyard garden.

It's likely if you have a riding mower, your covering a larger area, meaning more regular sharpening is needed for the best cut.

Hour Spent Mowing

The time you spend mowing can impact when your blades need sharpening, by average, mowers say you should sharpen your blades once every 25 hours.

However, during different growing seasons, you might want to cut back on this mowing time and allow the grass to grow, meaning you should reduce the sharpening of your blades.

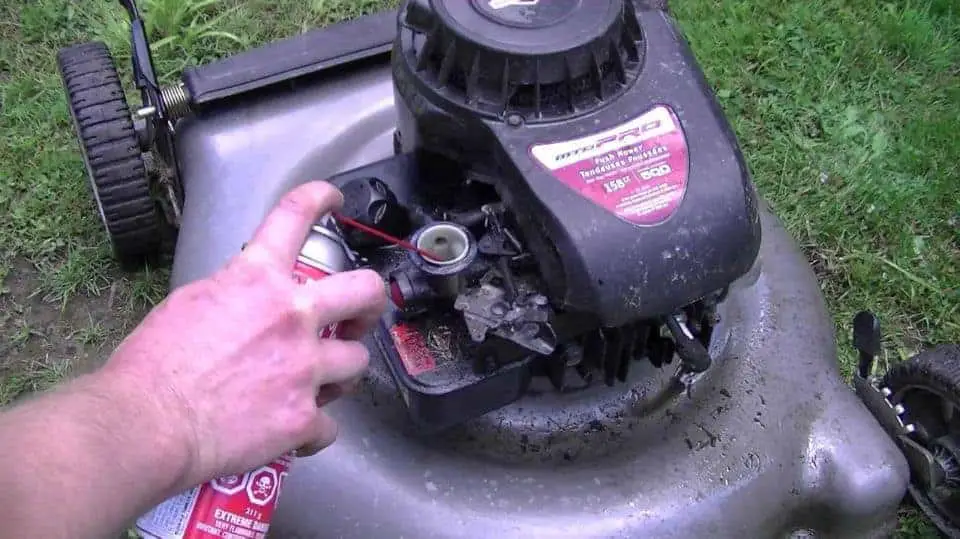
How To Sharpen Your Riding Mowers Blades

If you have figured out it's time to sharpen your riding mowers blades, then you are probably wondering how to sharpen the blades most safely and as easily possible.

We have put together a little step by step guide below for you to follow when sharpening your riding mowers blades.

Tools

  • Hand grinder medium.
  • Ratchet.
  • Blade balancer.
  • Goggles.
  • Floor jack.
  • Table vice.

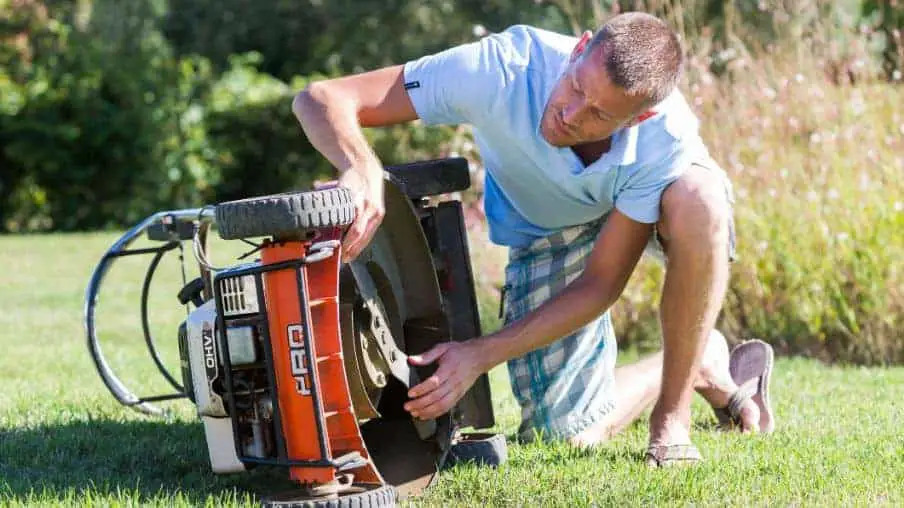
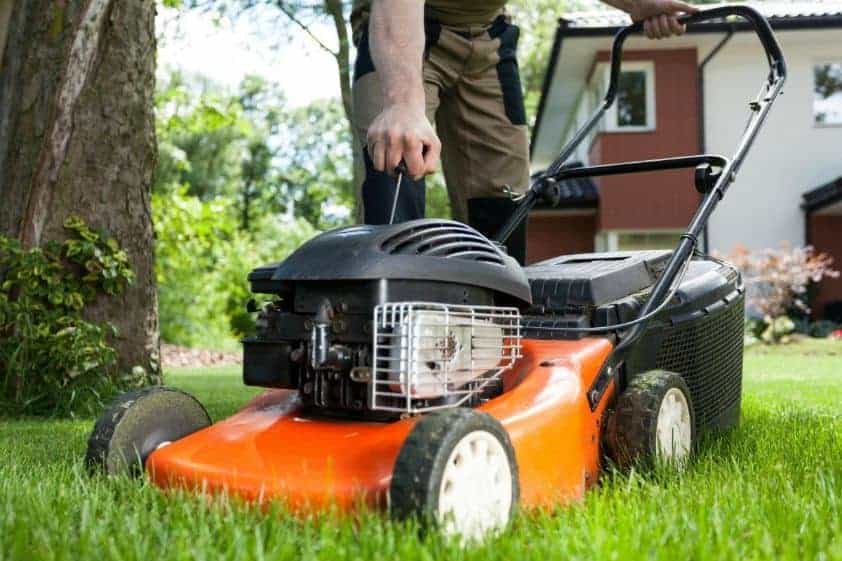
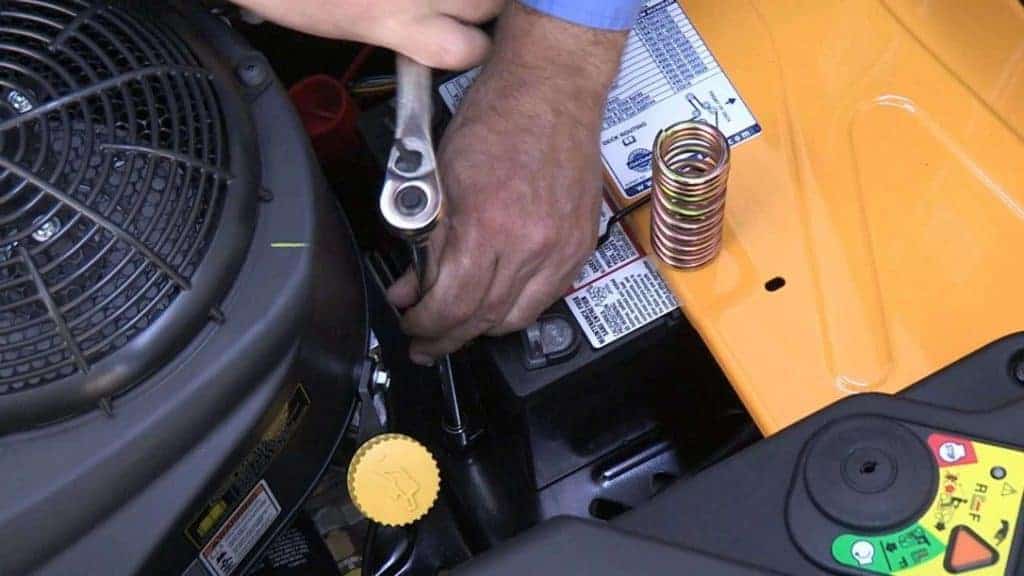
Step One - Raise Your Mower

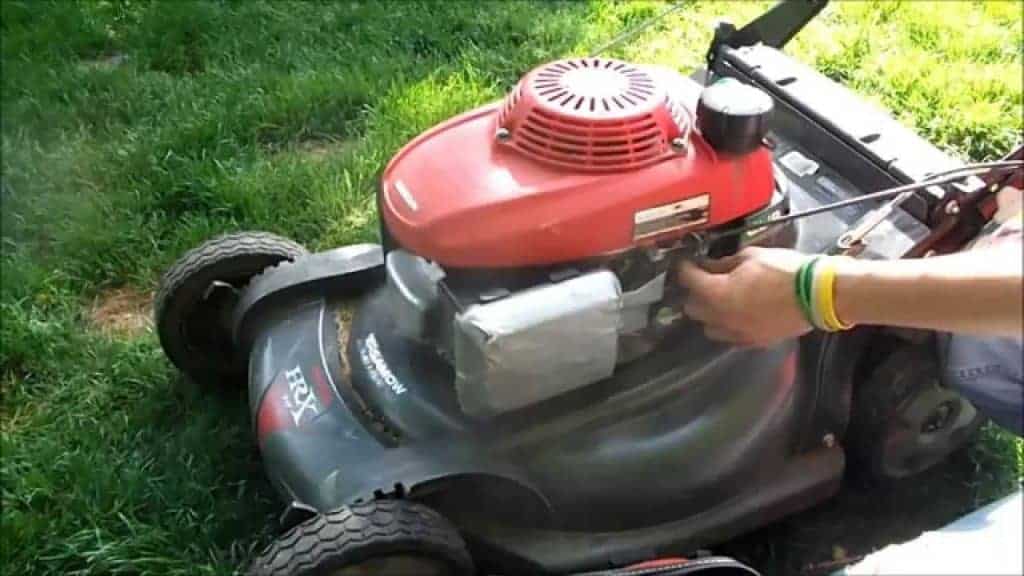
The first thing you need to do when sharpening your riding mowers blades is lifting the mower itself.

Place your floor jack down and lift the mower with it accordingly till the highest point, find the bolt that is securing your mowers blade on the deck.

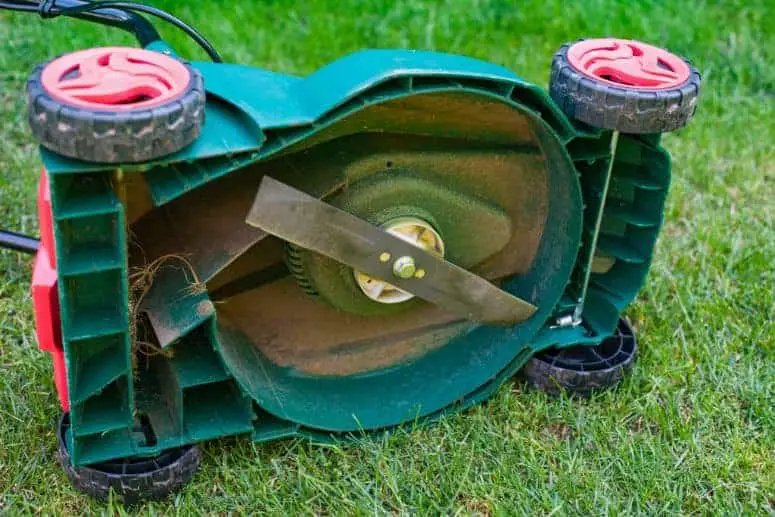
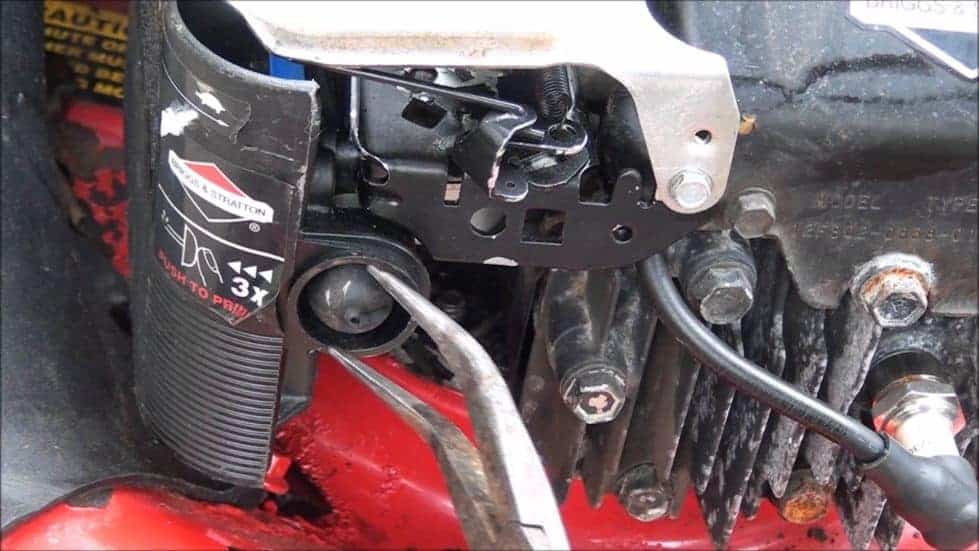
Step Two - Take Off The Blade

Put a wooden block against the blade and mower deck to keep it stable while you remove the blade, then you use the appropriate socket, whether a six socket or twelve depending on what matches your bolt and attach it to the ratchet.

Twist your bolt anti-clockwise to remove the blade.

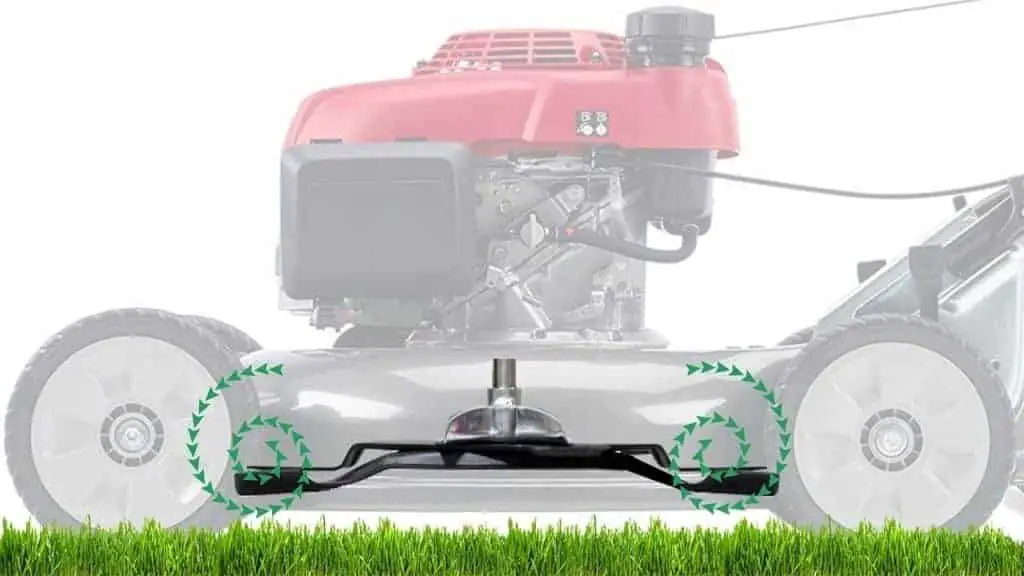
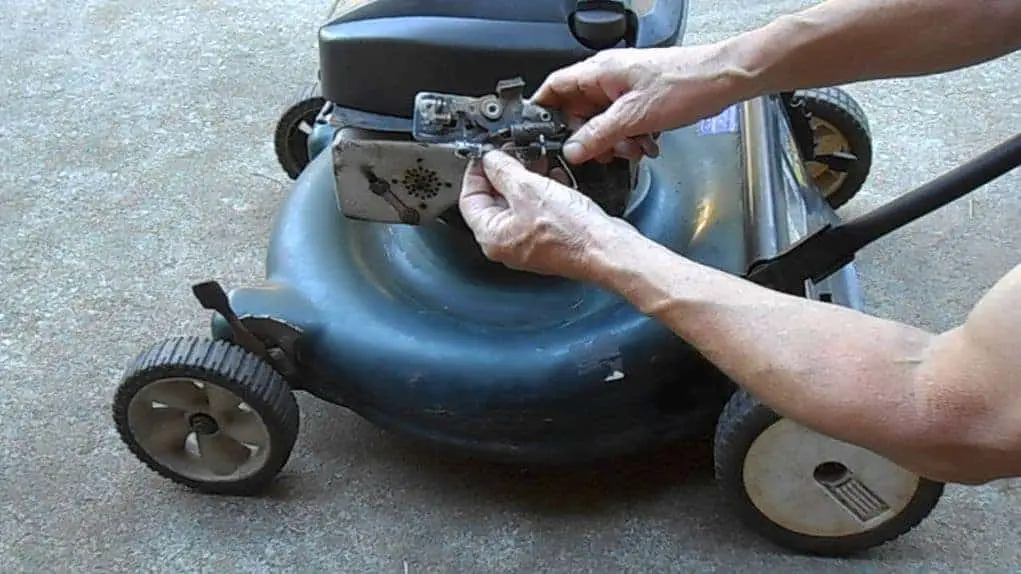
Step Three - Secure & Sharpen One Side Of Your Blade

Now we have removed the blade of your mower we can secure it in our table vice with equal parts of the blade remaining on each side.

Put on your goggles and start sharpening one side of your blade with your medium grinder, you should grind your blade at a 45-degree angle, make sure you maintain even pressure and only sharpen the top side.

You can tell when your mowers blade is sharp enough by looking for a shiny finish rather than depending on thickness.

Rotate your blade 180-degrees when you are done and repeat on the other side of the blade.

Step Four - Balance Time

After sharpening your blades, it's time to ensure that it is evenly balanced to avoid any unwanted vibrations happening on your mower.

Use a blade balancer to check if your sharpening on the blade is even, if it is not balanced on one side then re-sharpen your blade until it is, and vice versa for the other side.

Step Five - Reattach Your Blade

Now your mowers blades are sharp and balanced, you can reinsert your blade in the same position as it was when you removed it and retighten the bolts in a clockwise direction with the ratchet.

Make sure you do not accidentally tighten the bolt too much.

After you have successfully replaced your blade, you can lower your riding mower back down slowly and remove the jack.

Frequently Asked Questions About Sharpening a Riding Mowers Blades

What size blades should I buy for my riding mower?

Your blade size should match the size of your cutting deck, so if you have a 40-inch cutting deck then you should likely look for a 40-inch blade.

Always make sure you install the right blades for your specific mower model.

When do my mowers blades need replacing rather than sharpening?

If your blades are damaged or bent in any way then you should replace them immediately. Also, old age and signs of the blade not being able to stay sharp are good indicators you need a replacement.

How can I lift my riding mower to sharpen the blades?

To lift your mower you can use a floor jack, this will make it easier to get underneath your mower and change the blades.

Final Words

To conclude our article, how often you sharpen your riding mowers blades ultimately depends on how often you use it, the lawn size and its condition, as all these factors can impact the wear on your blade.

Always remember that if you after a more professional look on your lawn, it's best to keep your mowers blades sharpened after every 25 hours of use or less.

How To Know When Lawn Mower Blades Need Replacing? Find Out Here!

When Should I Replace My Lawnmowers Blades?

The blades of your mower are without a doubt, the most important part of your machine, it is vital they are kept sharp and in good condition, otherwise, you risk ripping your grass rather than cutting it.

It can be difficult to know when your blades need replacing however, normally, a sharpening can make your blades seem brand new again.

Sharpening a blade that needs to be replaced can make it brittle, and depending on the quality of your blade and what you use it for, you may need to replace it every season.

So to figure out when the right time is to replace your mowers blade, we have listed out some signs you can be looking for which will let you know when your mowers blade has reached its end of life.

Let's get into it!

Different Types Of Mower Blades

Before we get into the signs of when your lawnmower's blades need to be replaced, it's a good idea to get to know the different types of blades out there for your machine.

This way you can ensure you are using the correct blade for what you are doing.

We have listed out the three most common types of mower blades below and what you can use them for.

  • Mulching blade - Mulching blades have curved edges and allow you to cut grass very finely in a 'mulch' style. This blade is very common and can be used on a variety of different lawnmowers to cut grass.
  • High-lift blades - These blades are perfect for that precise and professional cut and can go up in measurements to 20 inches. They also give airflow to push clippings in the discharge chute of your machine.
  • Gator blade - Gator blades tend to have serrated edges and have three in one options such as; high lift, medium and low for different cutting heights on your lawn.

When Do I Replace My Mowers Blades?

On average, a mower should be replaced every 200 hours or at the start of every season each year. This could be more often if you mow a lawn with lots of stick and stones as this can cause more wear on your blade.

Always sharpen your blade a couple of times before replacing it so as you can get the most use out of it possible, and if the blade becomes completely damaged before the end of the season you must replace it straight away.

Using a damaged blade is dangerous and may damage your mower/grass even more.

Common Signs It's Time To Replace Your Mower's Blades

From an uneven cut on your lawn to torn grass and chipped blades, there are a few sure signs you can be looking out for which should indicate to you when its time to get new blades for your lawnmower.

We have listed the most common signs below to help you out.

Your Blades Are Old

One of the easiest indications that it's time to replace your mowers blades is if they are old. After a few years of mowing with your blades, it's a good idea to replace them according to what your manufacturer recommends, even if you reckon they are in good condition.

Around two years or more is a good time to get a new set of blades for your mower.

It Cuts Grass Uneven

Dull blades will leave an uneven cut on your grass after mowing, if your blades are in good condition, all the grass should be cut to the same height and you should not need to go over the same area twice.

The Blade Is Dull After Sharpening

Using a mower that has old and dull blades will tear your grass and leave that horrible yellow look on your lawn after mowing.

If you sharpen your blade twice and your lawn is still getting similar results after cutting, then it's time to replace your blades.

Trying to sharpen a blade too many times at the end of its life will cause it to become brittle and become a safety hazard, so you should always replace it straight away when you notice it has become dull and can't be sharpened anymore.

Blades Are Damaged

If your blades have accumulated rust or they are bent/damaged then you should change them as soon as possible. Damaged blades can often happen if you have mowed over something hard like sticks or stones.

You can easily figure out if your blades are causing issues by; listening to see if your mower is vibrating, checking if your mower keeps stopping or a strange noise coming from the engine.

As soon as you figure out your mowers blades are damaged then get a new set and avoid turning on your machine till they arrive.

The Grass Is Torn

One of the last signs that you need to replace your mowers blades is by looking at the grass that has been mowed.

If the tips of your grass look torn rather than smoothly cut with a sharp blade then you need to get a replacement. This is important as it can affect the health of your lawn.

How To Replace Your Lawnmowers Blades?

Now we have figured out how to determine when your mowers blades need replacing, you might be wondering how to change them yourself at home.

We have listed out some simple steps for you to follow so you can replace the blades of your lawnmower with the correct tools and safety precautions.

Tools Needed

  • New blade of the correct size and type.
  • A putty knife.
  • A wrench.
  • Safety gloves.

Steps For Changing Your Blade

  • Step one - Remove the spark plug from your mower and tilt it on its side at a 45-degree angle with the carburettor facing up to prevent fuel/oil from leaking out of the machine.
  • Step two - Take off the nut that is securing your mowers blade with your wrench.
  • Step three - De-attach your old blade from your mower and put it away somewhere safe, use your knife to take out any old debris that was stuck around your old blade.
  • Step four - Attach your new blade to your mower and make sure it is in the correct cutting position (with the cutting edge pointing to the wheels of the mower).
  • Step five - Retighten the nut very securely till you can't turn it anymore, put the mower back on its feet and reattach the spark plug to the machine.

Frequently Asked Questions About When To Replace Blades On a Lawnmower

When should I sharpen my mowers blades?

This depends on how much your mower is in use, but they should be sharpened on average at least 1-2 times per season.

How can I tell if my blades just need sharpening rather than replacing?

Several factors can determine whether you should replace or just sharpen your blades. For example, if your blades are old, in constant use and they have obvious signs of wear and tear such as rust or dents then you should replace the blade.

However, if your blades are fairly new and you don't use them too much then they probably just need sharpening if you notice you are having more of a hard time cutting grass.

Is it easy to notice when my blades are damaged?

Yes, as soon as your blades are damaged you will notice a downgrade in the performance of your mower and how smoothly it cuts grass, some mowers may even start vibrating or making unusual noises.

Final Words

To round up our article, you should always replace your blade when its; old, damaged, tearing grass, cutting unevenly or still dull even after sharpening.

Always make sure you wear protective gloves when handling the blade of your mower for replacement and make sure the spark plug is removed from the mower before doing any kind of repair or maintenance.

Should I Sharpen Or Replace Lawn Mower Blades? Here's Our Advice..

Sharpening Or Replacing Your Mowers Blades - Our Guide

When the time comes to inspect your lawnmower's blades, you might be wondering whether you need to replace them, or just give them another sharpen.

By rule, you should replace your blades at least once a year, but if they show signs of irreparable damage such as them being bent or cracked, then you might need to replace them sooner. If your blades are still new and the cutting edge just looks a little dull, then sharpening them is the better choice.

We have listed out some simple ways to determine if you just need to sharpen or replace your blades in a guide below, and how to do both methods if needed.

Should I Sharpen Or Get New Blades?

Before we get on to how to sharpen and replace the blades of your mower, it's a good idea to know when it's time to fully replace them or just give them a quick sharpen.

Signs that your blade needs just sharpening are -

  • Your grass is looking torn rather than cut and your blade is still new.
  • The cutting edge to your blade looks blunt.
  • It's cutting the grass unevenly.
  • They are still thick.

If the blade of your mower reaches these criteria above then you should be fine to just sharpen your blades rather than replace them.

Signs that your blade needs replacing are -

  • The blade is cracked, damaged or bent.
  • The blade is thin.
  • Two/three years of age.

When your mowers blades start to get brittle and thin or they are suffering visible damage with cracks, you need to replace them straight away, as just sharpening them could cause the blades to snap during use if they have reached the end of there life.

When Should I Replace Or Sharpen My Mowers Blades?

Figuring out when to replace or sharpen your mowers blades comes down to individual usage.

If you mow a large garden and want to keep your lawn looking professional, you should aim to sharpen your blades twice a season or for every 25 hours of use.

In terms of replacement, once a year should be fine, but you may have to replace the blades sooner if they get damaged or cracked.

Sharpening your mowers blades may have to be done more often if your garden has a lot of obstacles that are wearing down the blades cutting edges such as leaves and tree roots.

How To Sharpen Your Mowers Blades

If you have decided your blades need to be sharpened instead of replaced then we have put together a small step by step way to sharpen your mowers blades in the safest way possible below.

Tools Needed

  • Gloves.
  • Goggles.
  • A metal file.
  • Vice.

Steps

  • Step one - Tip your mower over with the air filter and carburettor facing up towards the air, remove the spark plug to avoid any accidental start-ups of the mower.
  • Step two - Use a flat metal file to sharpen your blade at a 45-degree angle.
  • Step three - If you find that your blade needs extra attention and is unbalanced then remove the blade completely by undoing the bolts with a wrench.
  • Step four - Secure the blade in a vice and disc grind the blade instead, try not to go overboard and grind until your blade is shiny again, check the balance after with a blade balancer before reattaching the blade.
  • Step five - Secure your blade back on, but not too tightly.

How To Replace Your Mowers Blades

If your mowers blades have irreparable damage, then you need to know how to replace them rather than sharpen them.

Tools Needed

  • New blades of the correct type and size.
  • A socket wrench.
  • Gloves or safety equipment.
  • An Allen key.

Steps

  • Step one - Start by disconnecting the spark plug from your mower and tipping it on its side as we did in the sharpening steps.
  • Step two - Use a wrench to take off the bolt which is securing the blade to your cutting deck on the mower.
  • Step three - Remove the old blade of your mower and put it somewhere safe, insert your new cutting blades in the right direction and ensure they are balanced.
  • Step four - Secure the new blades by tightening the bolts and make sure they still have movement when hit so as they can absorb impact rather than shatter.

What Type Of Blades Should I Choose For My Mower?

If your planning on replacing the blades of your mower or you want to get a spare set in case your old ones get damaged, you might be wondering what type of blades you should go for.

It can be useful to have different types of blades for your mower depending on how you want to cut your grass.

We have listed out the two main types of mower blades below -

  • Discharging - These types of blades are additionally known as lifting blades and are designed to produce airflow which pulls grass up for the cutting process. The blades have a curved edge and come in either low lift, medium-lift or high lift, with the highest lift being the most suitable for long and thick grass.
  • Mulching - Mulching blades allow your grass clippings to be grounded up, acting as a home-made fertiliser for your lawn. These blades are sometimes known as 3 in 1 blade and make your mower work a lot harder.

Frequently Asked Questions About Deciding When To Sharpen Or Replace Your Mowers Blades

Do I need to sharpen my mowers blades when they are new?

No, when your blades come straight from the manufacturer they do not need to be sharpened and can be put straight on to your mower.

What can make my blades wear out faster?

Using your mower on very overgrown grass or sticks and debris can cause the blades to wear out faster.

Are there universal mowing blades?

No, there is no such thing as 'universal' blades, however, you can find blades that fit on multiple different manufacturer models as long as the blade matched the thickness, length, width and hole sizes of your mower.

Last Words

To conclude, figuring out when to sharpen or replace your mowers blades will be based on your individual use and inspection of your blades, you should always replace the blades of your mower straight away if they become damaged.

Can You Jump Start A Mower With A Car Or Vice Versa? Find Out Here!

Is It Possible To Jump Start a Lawnmower With a Car?

Getting a flat battery on your lawnmower can be disappointing, leaving you unable to use your mower again until you buy a replacement battery, all you hear is the unforgivable clicking noise coming from your mower and you know it is the dreaded battery.

A thought may cross your mind, surely I can jumpstart my lawnmower with a car?

The answer to that is, yes, you can jumpstart your mower with a car as long as it is a riding mower and has a 12-volt battery. However, jumpstarting your mower's battery is something you need to be cautious about. 

We have put together an information guide below about how to check your mower's battery and jumpstart it safely with a car, always remember if you are unsure about the process, it's better to hold off and get a replacement battery instead.

So without further ado, let's get into it!

Precautions To Consider Before Jumpstarting Your Mowers Battery

Before we get into our step by step guide about how to jumpstart your riding mower's battery, there are a couple of factors to consider first and foremost.

Firstly, as we mentioned briefly above you need to make sure that your lawnmower is using a 12-volt battery, you also need to ensure that your battery is not leaking and it hasn't reached its end of life.

You likewise need to eliminate that it could be other components causing issues with your mower before jumpstarting the battery. Other places to check on your mower are the; spark plug, filers, fuel level and oil on your machine.

A clicking noise coming from your mower will always be the biggest indicator that something is wrong with your battery.

How To Jumpstart Your Mowers Battery With a Car

Now have covered the other factors to consider before jumping your lawnmowers battery, we can get on to how to do it.

There's a couple of tools you will need on hand before starting the jumping process.

Tools Required

  • Leather gloves.
  • Vaseline.
  • Jumper cables.
  • Baking soda.
  • Goggles.
  • A wire brush.

Preparation Steps

Before you start jumping your mower, you will need to check the following list below to ensure you are safe and your mower's battery is prepared.

  • Wear gloves and safety goggles to protect yourself from the battery of your mower in case it is leaking.
  • Sprinkle some baking soda on to the terminals of your lawnmowers battery beforehand to neutralise the acid.
  • Clean your battery with a wire brush and put Vaseline on the poles to prevent corrosion.
  • Make sure the terminals are not damaged as this can stop the battery from being recharged by the alternator.

Steps For Jumping Your Lawnmower

Step one

Move the car to your mower but ensure they are not touching to avoid short-circuiting the mower. You just need to ensure the jumper cables will be able to reach the car to the mower.

Step two

As we mentioned in our preparation steps above, you need to clean the corrosion from your battery terminals before connecting up the batteries together.

You can do this with a wire brush and some Vaseline.

Step three

Now it's time to connect the batteries, you must make sure this is done in the right order otherwise the jumping process may not work.

Take the red clamp of your jumper cable and connect it to the positive terminal of the battery on your car, then take the other red clamp and attach it to the positive terminal of the battery in your mower.

Then take the black clamp of the cable nearest to the car and attach it to the negative terminal on your car's battery, put the other black clamp on the side of your mower to a part of your mower's engine (do not connect it to the negative terminal on your mower's battery).

Start the car and allow the mower's battery to charge up, in case nothing works always start by disconnecting the batteries in the correct order, starting with the red clamp connected to your cars positive terminal first.

Step four

Try turning on your mower while the engine of your car is running to see if the mower's battery has charged, keep allowing the mower's battery to charge if it's still not starting yet.

Step five

When your mower's battery has got enough charge to power on, remove the cables in reverse order.

This means you should start by disconnecting the black jumper cable clamp from the engine of your mower and then so on.

Is There Another Way To Start My Mower If Jumpstarting Doesn't Work?

If this jumpstarting method doesn't get your mower's battery going then you may have an issue with your mowers; alternator, voltage regulator or the battery may have reached its end of life which is common after about two-three years of heavy use.

There are some other methods we will list out below that you can try to get your mower's battery going if it still won't start or your nervous to try battery jumping your mower.

  • Push start it - If your riding mower has a manual transmission you can try to push start it like you would with a car. Simply move your mower up a steep hill and depress the clutch while your mower is on the lowest gear, hold the clutch down and release the brake on your mower, allow your mower to roll down the hill and release the clutch when it reaches the top speed.
  • Use an extra car battery - Install a spare battery from your car like normal with thick cables and see if it can provide enough power to start your mower, this may not work but it's worth a try!

How To Look After Your Lawnmowers Battery

Now you know how to jumpstart your mower's battery, it's a good idea to be familiar with how to maintain it to avoid running into issues like this in the future.

We have listed out some important maintenance tips for your mower's battery below to keep it in the best shape possible.

  • Invest in a maintenance charger - The battery of your mower will most likely need to stay with a regular charge cycle, linking it up to a maintenance charger is a great way to keep your battery healthy.
  • Fill it up - Not all but some lawnmowers batteries need to be maintained and filled with water to work. Always fill your battery with distilled water when it is running low.
  • Clean the battery - Corrosion build-up can ruin your batteries terminals quickly if you don't clean them regularly. Try cleaning the terminals with a wire brush as we mentioned above and putting Vaseline on them to stop build up.
  • Secure & use the correct battery - Make sure you are using the right voltage and sized battery in your mower, also ensure the terminal connections are tight enough.

Frequently Asked Questions About Jumpstarting Your Mower

How do I know if the battery is dead on my mower?

Check the oil and fuel levels on your mower first, then listen out for a clicking noise coming from your mower's battery when you are in a quiet place, a clicking noise tends to mean a dead battery.

Is there a way to maintain my batteries charge?

Yes, you can make sure your mower has a good battery charge by using it at least once a week, if your planning to leave it untouched for a long period then buy a maintenance charger for it.

Is it dangerous to jump-start your mowers batteries?

There is always danger involved with jumpstarting your battery, however as long as you are wearing the correct safety equipment such as leather gloves and goggles and you follow the right order of jumping, you should be fine.

Last Words

It is possible and easy to jumpstart your mower's battery with the three methods above, however, always check oil and fuel levels, as well as the spark plug on your mower before deciding the battery is the issue.

If you are not confident with jumpstarting your mower's battery, its better you swap it out for a new one or get a professionals help.

Why Does My Lawn Mower Vibrate So Much? Find Out Here!

Lawnmower Is Excessively Shaking - Our Troubleshooting Guide

Lawnmowers are by no means quiet, especially if your mowing over uneven bumpy ground, some shaking noise is to be expected from the engine as it is working hard to cut your lawn.

However, excessive vibration can be a sign of a problem with your mower. Your lawnmower might be vibrating too much because of the blades, valves, engine or crankshaft.

We have gone into further detail below about what could be causing this vibration in your mower and how to fix it so as you can be mowing your lawn in peace.

Common Problems That Cause Vibration In Lawnmowers

From unbalanced blades to a bent crankshaft, there can be many different problems occurring in a mower that could be causing excessive vibration.

You should always stop the engine of your mower immediately when it starts to vibrate as this could even cause the blade to fly off and become a safety hazard.

We have listed out the typical parts in your mower which could be causing these problems below so as you can troubleshoot your mower and get to the root of the problem.

Damage/Debris On The Cutting Blade

If you mow in an area with a lot of trees and stones then it could be damaged from the sheer impact of hitting a hard object, causing the mower to vibrate.

Debris such as clay or mud can additionally get stuck on to the blade, causing the extra weight to make vibration on one side of the mower as the blades to spin around.

This is due to the uneven balance which will cause the mower to shake and vibrate when in use.

Solution

Always check for sharp objects and debris that can damage or attach themselves to your mower before you start cutting your lawn.

If you find that your blade is damaged then you need to replace it straight away otherwise it may affect how other parts of your mower operates.

Debris, on the other hand, can be easily cleaned off with a hose or stick, this should stop the uneven weight which is causing the vibration while mowing.

The Blade Is Unbalanced

Hitting rocks or sharp objects while mowing can also chip or unbalance your blade, causing vibration while in use. Bad sharpening of the blade may also mean one side of the blade is balanced and the other is not.

An unbalanced blade is similar to a washing machine and will make a lot of noise if it is unstable, causing vibration.

Solution

Try balancing your blade and see if this fixes the issue, and also tighten it, because if the blade is loose this could be causing the machine to make noise.

You should also sharpen your blade evenly on each side.

You Need To Tune Your Engine

If your mower is not vibrating due to a damaged or unbalanced blade then it could be due to the engine needing tuning.

When the engine on your mower needs tuning it will likely run rough and vibrate.

Solution

Keep good maintenance on your mower and tune it often so you can avoid this issue. This will also stop it from getting worn down too quickly.

There Is a Damaged Crankshaft

If your mower has run into something hard or heavy then the crankshaft could be bent or damaged, causing the blade to spin unevenly.

A loose crankshaft or mount can also make your mower run with vibration, especially if they are not tight against the frame of your machine.

Avoid using your mower while your crankshaft is bent or unbalanced as it can cause further damage to your mower and become an even bigger issue.

Solution

If your blade is damaged by an external force then the crankshaft most likely is too, repairing the crankshaft of a mower is not easy and may need to be done by a professional.

Always replace the blade before replacing the crankshaft and make sure to check if other parts on your mower are okay too such as the spark plugs and valves.

Your Flywheel Is Damaged

As we already know, when your mower hits something unusual such as a stone or rock it can damage numerous parts of your mower and cause a vibration.

This includes the flywheel key on your mower. Your flywheel key acts as a shock absorber on your mower and helps keeps the crankshaft and the flywheel in one position your machine, when this is damaged it can cause vibration while you use your mower.

You should be able to see if your flywheel has suffered damage just by looking at it.

Solution

Don't use your mower while there is an issue with your flywheel and replace the part as soon as you can before trying to start your mower again.

Try Adjusting Your Valves

If you have checked everything above and the blades on your lawnmower are fine and not damaged then you might need to adjust the valves on your machine.

So if you have a flathead mower you may need a professional to adjust these for you. Valves in the wrong position can cause an annoying vibration.

Solution

For a regular mower, not a flathead mower, you can readjust the valves into the right position, if you have a flathead then you need a professional to help you do this so as you can stop your mower from vibrating excessively.

How To Stop Vibrations In Your Lawnmower

Now we have listed out the most common culprits which could be causing your mower to vibrate, we have listed out a summary about how to check these issues on a push mower and fix them.

  • Step one - Wait for your mower to cool down and see if the engine housing on your machine is loose. Tighten the nuts and bolts to make sure everything is secure.
  • Step two - Remove the spark plug from your mower and tip it over to prevent leaks, look for any debris which has attached itself to your lawnmower.
  • Step three - If your blade is bent, you can push it against a piece of a wooden block to straighten it up. Then remove the nut holding down the blade and lubricate it, take off the blade underneath the nut that we straightened.
  • Step four - Take off any debris and grass stuck to the frame then install a new blade on your mower by retightening the nut you lubricated and turning the mower back over.
  • Step five - Reattach the spark plug on your lawnmower and see if the mower has stopped vibrating.

Frequently Asked Questions About Lawnmowers Vibrating Too Much

What is a crankshaft?

A crankshaft is a bridge between the pistons and flywheel of your motor, the role of it is to crank the flywheel of your mower in a circular motion.

How often should I replace the blade on my mower?

You should replace your mower at least once every year or season depending on how much you use it, if you damage your blade then you might have to replace it before this point.

What signs should I look for when I need to sharpen my mowers blades?

Signs that your mowers blades may need sharpening are vibration obviously, torn not cut grass and missed patches of cutting when using your mower.

How do you tip a lawnmower?

You should tip your lawnmower with the carburettor and spark plug pointing up so as fuel cannot leak from this side.

When should I tune my mowers engine?

You should tune your mowers engine after every 50 hours of use or at least once a season to keep it in the best shape possible.

Final Words

Overall, if your lawnmower is vibrating too much then you should always check your blade and crankshaft first before looking at anything else.

These parts of your mower take the brunt of any sharp or hard objects from your lawn such as rocks, and when bent or unbalanced can cause your mower to shake.

Simply replace or re-straighten these parts on your mower and it should be working as good as new after!

Lunes, Pebrero 22, 2021

Why Does The Lawn Mower Keep Cutting Off? Find Out Here!

How To Fix Your Lawnmower That Keeps Shutting Off

Having a lawnmower that keeps cutting off after every ten seconds or so when switches it on can be frustrating and time-consuming, leaving you clueless as to what the issue is that might be.

Your lawnmower could be cutting off for several reasons depending on whether it is an electric lawn mower or a petrol lawnmower, some of the typical reasons for this continuous cut off could be a bad switch, stale fuel or a damaged air filter. 

So to help you figure out why your lawnmower keeps cutting off when you start it, we have listed out the common problems in electric and petrol mowers, along with how to solve them so as your mower can be running continuously we no unexpected shutoffs.

Reasons Why Your Electric Lawnmower Is Cutting Off

Compared to a petrol run lawnmower, the reasons as to why your electric lawnmower might be cutting out is pretty easy to pinpoint and tends to be due to the motor, cables or start switch of your model.

We have listed out the main reasons below and how to solve them.

The Cable

The cable of your electric lawnmower is one of the most important parts of your mower, as this is what provides power for it to work.

Common issues with cables that cause your mower to cut out are internal damage inside the cable. Internal damage can be caused by flexing, pulling or pushing your cable to hard during use.

To check if your cable is working, you can use a multimeter, and if this identifies no issues then you might just have a cut cable, which can happen by accidentally running over the cable, luckily, it can be replaced easily with the right matching cable for your model.

Additionally, if the above steps don't work, you can try unplugging and replugging your cables to see if this fixes a loose connection, as well as looking out for any dirt or frays that indicate you need to change your cables.

Your Battery (Cordless Models Only)

One of the next most obvious reasons as to why your cordless mower could be cutting out is due to the battery.

This could mean your battery is low on charge or has reached the end of its life, so you can try inserting a new battery to see if this makes a difference and stops your mower from cutting out.

Start Switch

The start switch on your mower is the 'on switch' and can give intermittent power problems such as cutting out the motor when the switch is damaged.

If there is no power at all then you could potentially have a failed start switch which will need replacing by a professional.

The Motor Has Issues

Your lawnmower motor is responsible for turning the blades inside of the mower, overheating issues and start switch problems can cause the mower to intermittently cut out during use.

Also, check the air vents to make sure there is no debris clogging them up and preventing the blades from turning. Your motor could potentially be overworked too from heavy-duty work and may need time to cool down before using again.

You may have to replace your motor entirely if these issues persist.

Summary

  • Unplug your electric mower or remove the battery.
  • Check the power cord and battery.
  • Look for a loose connection.
  • Empty the grass bag.
  • Double-check the air vents for blockages.
  • Study the start switch.
  • Consider your motor.

Reasons Why Your Petrol Mower Keeps Cutting Out

If your gas lawnmower keeps cutting out then you might find issues such as bad fuel or a problem with your carburettor is the reason for this frustrating problem.

We have put together some of the typical problems as to why your gas-powered lawnmower could be cutting out below.

You Have Bad Fuel

Gas can start to go bad pretty quickly from 30 days onwards and leave sticky deposits behind in your machine that can cause issues with the fuel flowing in your mower.

To fix this problem you should try switching out your fuel or using a destabiliser in your mower next time if you leave it for long periods in storage.

Poor Air Flow

Mowing on a lawn with very tall grass could be clogging your air filter and shutting off air to your mower's engine causing the cutout. Debris, long grass and other dirt can get into your filter from long grass and enter the cylinder.

To prevent this from happening don't use your mower on very tall grass and clean the air filters regularly.

Try Adjusting & Cleaning Your Carburettor

If you have checked the above parts on your mower, then you might need to move your focus on the carburettor of your mower.

If you want to adjust your carburettor on your mower you will need this done so as it can correspond perfectly to your engines speed.

You may also need to get your carburettor cleaned as dirty fuel can stick to the bore or screen inside of your carburettor and suffocate the mechanism, resulting in an engine that may cut out due to needing more fuel that can't reach.

Check The Spark Plug

A damaged or chipped spark plug can cause your mower to run for several minutes then cut out, you can inspect your plug for any carbon and clean it with a brush if it's dirty, but if this does not solve the problem you might just have to replace the spark plug entirely.

Summary

  • Gently tip your mower to the underside.
  • Check your fuel.
  • Study the air filters.
  • Look for a faulty spark plug.
  • Adjust & clean the carburettor.

Safety Tips For Checking Your Mowers

Now we have identified the main common problems that could be causing your electric mower/gas mower to cut out, we have listed out some safety tips for you to consider before you start examining your mower.

Safety Tips

  • Ensure you are wearing thick safety gloves when checking your mower over as this can stop you accidentally cutting yourself on the blades.
  • Always unplug your mower or remove the battery to avoid starting the mower unexpectedly.
  • Make sure that everything you have removed from the mower is firmly placed or connected back before restarting your machine, failure to do so could cause even more damage to the mower.
  • Get a professional to check your mower if you are unsure or not confident in fixing the machine yourself.

Frequently Asked Questions About Why Your Lawnmower Keeps Cutting Off

What is a carburettor?

A carburettor on a lawnmower is the cylinder inside your machine which mixes the fuel and air inside the mower for combustion to power the engine, if your carb has problems then this might be why your mower is cutting out.

How quickly can gas go bad in a lawnmower?

Gasoline inside a lawnmower can go bad in as quickly as 30 days, however, you can add a stabiliser to your fuel if you want it to last for longer.

What are some signs of a poor air filter in a mower?

Signs of a bad air filter could be smoke, cutting out and running rough, or if your mower is generally hard to start.

Last Words

To round up our troubleshooting guide, if your mower is cutting out then you likely need to check the cables and battery first if you have an electric mower, or the age of the fuel and the carburettor if you have a gas mower.

Most of these issues can be resolved by cleaning your mower or contacting a professional for the carburettor replacement.

What Causes A Lawn Mower Not To Move? Find Out Here!

Why Is My Lawnmower Not Moving?

If your lawnmower is becoming difficult to start, the thought of figuring out what the issue is in these complicated pieces of machinery can be overwhelming and difficult.

Your lawnmower might not be moving due to cold weather, bad fuel or a faulty spark plug. Valves and fuel can be sensitive to temperature change in cold climates, so you will need to eliminate all these issues before figuring out why a lawnmower is hard to start. 

To help you out, with listed out some common start-up issues below to understand why your lawnmower might be hard to start and how to fix it.

Here Are Some Reasons Why It Could Be Hard To Start

Investing in a high-quality lawnmower, only to find after a couple of years its hard to start can be a disappointing problem.

However, most of these issues can be solved and repaired easily, so we will list a few of the common issues below to see if they can solve the

difficult start-up on your mower.

The Fuel

One of the first things to check on your mower if your experiencing problems starting it is the fuel.

First of all, make sure the fuel tank in your mower has enough fuel, yes, some people can try to start a mower without fuel and wonder why it's not starting (we know).

Also, ensure the gas in your mower is not old, gas nowadays can go bad in about 60 days, so if your getting your mower out of storage then you might have a 'gone bad' gas problem. This can be fixed by using a stabiliser in future and replacing this gas with fresh fuel.

You should additionally make sure the fuel has no debris in it as this can be sucked into the gas line and cause issues when trying to start the engine of your mower.

Double Check The Spark Plug

It's very common for the spark plug of your mower to give start-up issues if it is damaged or not fitted correctly.

You can try applying starter fluid to the spark plug, giving it a clean and checking if all the wires are connected properly to fix a bad spark plug.

If you think there is no spark on your mower then you should use a spark plug tester to see if a spark is occurring or not in your model and be replacing the plugs every year to avoid issues like this from happening.

Look At The Carburettor

After checking the fuel in your mower and the spark plug, the next thing you need to check is if fuel is getting from these places to the Carburettor on your mower.

The carburettor of your mower may be clogged from old fuel and sticky substance, you should make sure the fuel cap vent of your mower is open and the screen is clear of any debris.

To double-check if your carburettor on your mower is working you can place a teaspoon of fuel down the spark plug of your machine, retighten and start your mower.

If the engine runs then your carburettor might need a repair.

The Ignition

Always check your ignition is on and your spark plug wire is attached properly to the plug, additionally make sure your safety features are disengaged as they could be preventing the smooth start-up of your mower.

It's Cold

If you live in a cold climate, then temperature could be a reason why you are having a hard time starting your mower.

Temperature can affect the oil in your mower, making it of a thicker consistency when it is cold. Try changing your oil to a more suitable temperature grade one and seeing if this will help your lawnmower start-up.

Your valve may have also changed size from cold/hot conditions, this would need to be repaired and troubleshot by a professional.

The Air Filter

Lastly, the air filter in your lawnmower could potentially be clogged up, preventing your mower from starting, you could try cleaning any dirt and debris off your filter or replacing it entirely to fix this.

How To Maintain Your Lawnmower In The Best Way

We hate to say it, but most problems relating to difficult start-up in your lawnmower could be due to improper care or lack of maintenance on the mower to keep it in a good shape.

So to make it simple, with listed out some helpful maintenance tips for your mower below so as you can take the best care possible of your model.

  • Step One - Before cleaning your mower or doing any kind of repairs/ maintenance you need to make sure you remove the spark plug. This will stop any accidental start-ups of your machine which could be dangerous.
  • Step Two - Tip your mower over or put it on stilts so as you can get to the underneath, you should always be careful when tipping your mower according to the type of model you have. For four-stroke mowers, you should remove the air filter and never tip it on the side of the spark plug towards the ground. In two-stroke models, you can tip the mower anyway as long as fuel is not spilling.
  • Step Three - Check the blade of your machine and make sure it is sharp and clear of debris after use.
  • Step Four - Always check the air filter of your mower at this stage and see if it needs changing or cleaning.
  • Step Five - If you have a four-stroke model, change the oil if needed, this should be done about once a year.
  • Step Six - When storing your mower away for a long time after use put a fuel stabiliser or run your mower till the fuel tank is empty to avoid any stale fuel problems occurring at a later date.

Frequently Asked Questions About Why a Lawnmower Is Hard To Start

Why can't I pull my lawnmower with enough strength?

Hydro locking, chipped blades or a bad recoil spring could make your mower hard to start, most of these issues can be resolved but you may have to replace the crankshaft entirely if they don't work.

My mower is always harder to start when it's cold, why is this?

Lawnmowers that use the oil can be hard to start when it's cold as the temperature effects the consistency of the oil within the mower, making it thicker and requiring more effort to start-up.

How often should I change the air filter on my mower?

This depends on the quality of the air filter you are using in your lawnmower and its condition, this could be every month to once a year if you don't use your mower often.

Final Words

With the reasons above, you should be able to pinpoint why your mower is hard to start and how to fix it. You should always try to store your mower in the best way possible to avoid some of these issues occurring and keep on top of maintenance too.

What Is A Mulching Mower? What Are The Benefits?

Mulching Mowers - Our Best Guide

If you've been looking into buying a lawnmower for your garden, then you've probably come across mulching lawnmowers and wondered what they are, and how they differ from regular push mowers.

Well, mulching mowers have a similar aesthetic design to push mowers but differ in how they work. Mulching lawnmowers don't leave grass clippings behind like a standard lawnmower, and instead, use a special blade to grind these grass clippings into small pieces which are known as 'mulch', this mulch is then dispersed back on to your garden. 

So now you are probably asking yourself how these mowers can do this and what the advantages are to having mulch deposited back on to your lawn, in comparison to none.

We have put together a comprehensive guide below to help you figure out if you need a mulching lawnmower or not and the benefits of using one in your garden.

What Is a Mulching Lawnmower?

As we mentioned above, a mulching lawnmower is a machine like a regular push mower that collects your grass clippings and grinds them into mulch to be deposited back on to your lawn.

The grass clippings left behind on your lawn act as an organic fertiliser and can help keep your grass healthy and promote the growth of new grass. The blade of these machines can have multiple different blades or a single jagged edge blade depending on the mower you buy.

How Does a Mulching Lawnmower Work?

Now you understand what a mulching lawnmower is, we can get on to explaining how these designs work.

Mulching mowers don't have discharge chute like regular mowers and use their blades to toss the grass up into the machine so as it can be cut multiple times by the blade and form mulch which is small enough to sit on the soil of your grass like a fertiliser.

These mowers additionally have a taller mowing deck than regular models to allow for the grass to be cut multiple times due to being swirled around inside of the mower.

The mulch created by these mowers does not need to be removed like a regular one as its small enough to not suffocate your lawn beneath you.

Mulching mowers come in three different types; electric corded, electric cordless (with a battery) and gas-powered. Each type of mower will mulch your grass clippings the same but have advantages/disadvantages depending on what you want.

When Do I Need To Use a Mulching Mower?

If you are a homeowner trying to maintain your garden in the best way possible with minimal effort, it could be worth investing in a mulching mower due to the fertilisation it brings to your lawn.

They also stop you from having to empty garden waste often and are great if you have a garden that is full of leaves that you have to rake away constantly as it can mulch them instead.

So if your home garden is looking a little beat down, a mulching mower could potentially restore its health and promote new grass growth with little work.

What Are The Benefits & Drawbacks Of Buying a Mulching Lawnmower?

Mulching mowers come with a large number of benefits for your lawn, including making it healthier.

However, this is not say mulching your lawn with one of these mowers is all good, as they can also come with some disadvantages which you should be aware of before buying your mower.

Advantages

Mulching mowers are not only a great way to fertilise your lawn without spending money, but they are also much more eco-friendly than man-made fertiliser and help your lawn to become self-sufficient, meaning you don't have to maintain your lawn as much.

These types of mowers also don't tend to cost much more than regular ones and are perfect for people with allergies due to the way the machine self-contains its grass and doesn't disperse the pollen into the air.

Other advantages to mulching mowers have to be the fact you don't have to spend time and effort collecting the grass clippings or emptying your grass bag from the mower, they also stop you from having to rake leaves as the machine turns them into mulch.

Pros

  • Eco- friendly fertiliser.
  • Promotes a healthy lawn.
  • Good for people with allergies.
  • Saves time.
  • Doesn't cost too much more than a regular mower.
  • Makes your lawn self-sufficient.

Disadvantages

Even though mulching mowers are great for your lawn, they do come with some drawbacks. For example, your lawn will not look as neat after mowing due to this mulch deposited, which can be annoying if you are after a freshly mowed aesthetic for your garden.

You will also have to mow your lawn much more frequently to avoid having to cut long grass, as longer grass will be much more likely to form clumpy mulch and brown on your grass.

If your grass produces too much mulch it could potentially suffocate your grass too, especially if you are mulching the dead leaves in your garden, so you might end up having to redistribute some of the mulch anyway like collecting normal grass clippings.

Cons

  • Your lawn will look messy.
  • Can suffocate your grass if mulch is in excess.
  • Needs mowing more frequently.

Overall, as long as you don't mind a less aesthetic lawn after mowing, a mulching mower is a great investment if you are looking to make your garden more self-sufficient and want to avoid placing chemical fertiliser down on your soil.

What's The Difference Between Mulching & Side Discharge?

If you are after a fertilising mower, then you have probably seen old school side discharge mowers.

Both types of mower functions are great for promoting a healthy lawn due to the way they disperse clippings back on to your grass, however, they do have there pros and cons when compared against each other.

Side Discharge

Side discharge mowers spray their grass clippings out of there side discharge chutes and give a very quick and clean-cut to your grass.

They also allow for continuous operation which makes them perfect for larger lawns and great for cutting taller less maintained grass.

However, side discharge mowers in comparison to mulching models are very messy, as the discharge chute can spray your clippings anywhere such as driveways or flowerbeds, meaning you might have to clean up in a lot of places after using the mower.

It's cutting system also does not cut grass clippings as fine as mulching, making it a poorer fertiliser and giving it the ability to throw rocks or sticks out of its chute which can be dangerous.

Pros

  • Quick and sharp cut to your grass.
  • Continuous operation saves time cutting larger lawns.
  • Great for taller grass.
  • Tend to be a little cheaper.

Cons

  • Can be very messy.
  • The chute can disperse other objects such as rocks and sticks.
  • Clean up may be needed.

Mulching

Mulching mowers in comparison to side discharge ones do all there cutting inside their machine and the clippings just fall into the ground and do not get forced out a chute, making them cleaner and less likely to throw clippings in places you don't want.

This mulching function additionally does not fling rocks or stones out of its chute and makes the grass clippings a better fertiliser due to the way the grass is ground in their blades.

Downfalls of mulching vs side discharge have to be the slower blade speed and operating system which make this kind of machine less suitable for bigger lawns with very tall grass.

Pros

  • Clippings are less messy.
  • Better for fertiliser.
  • No chute can throw out dangerous items.

Cons

  • Slower blade speed makes it less suitable for larger gardens.
  • Not good for taller grass.

To round up both styles of fertiliser, mulching mowers tend to be better than side-discharge mowers if you have a small home garden which you want to be self-sufficient and don't want to be cleaning up grass clippings that have gone everywhere after mowing.

Side discharge mowers could be better if you care less about the mess created from the chutes and want to be able to mow larger areas at a quicker speed.

Frequently Asked Questions About Mulching Mowers

Can I buy a mulching attachment rather than a mulching mower?

Yes, if you are reluctant to invest in a mulching mower and already have a great regular mower at home, you can buy a mulching attachment that will come with blades for mulching instead.

Is it possible for mulching to help your grass grow?

Mulch will act as a fertiliser for your soil and help new grass grow, it also can help control weed growth on your lawn.

Can you mulch wet grass?

No, mulching wet grass will cause it to stick together in clumps on your lawn and can end up blocking your mower.

Final Words

Overall, a mulching mower is a great way to fertilise your lawn and make it self sufficient in comparison to a regular mower.

This is thanks to its special mulching blades which suck up grass and cut it multiple times before depositing it back on to the ground to create fertiliser for your soil.

Lawn Mower Won't Start After Winter, Here's What Could Be The Reason..

Why Is My Lawnmower Not Starting After Winter?

There's nothing worse than putting your lawnmower away after cutting season, only to remerge it from your shed after a couple of months and find it won't start.

Lucky for you, this is a common problem, and lawnmowers do tend to have issues starting after winter and can be solved by troubleshooting a couple of different parts on your mowers machines such as the spark plug, blades and gas. 

We have put together a large list of reasons as to why your lawn mower might not be starting after winter and how to fix them so as you can get to the root of the problem and revive your mower for a new cutting season!

So without further ado, let's get started.

Common Reasons Why Your Lawnmower Isn't Working After Winter

From old fuel to white smoke and faulty spark plugs, there is a range of reasons as to why your lawnmower might be giving you problems after being stored away during the winter season.

We have listed some of the most common reasons below to help you identify the issue with your mower and fix it.

Faulty Spark Plug

One of the most common reasons as to why your lawnmower isn't starting may be due to the spark plug. If your spark plug has been left unused for a long period then you might come back to a couple of issues.

To check if your spark plug is working you can remove the lead and unscrew the plug, then reattach the lead and place the tip of the spark plug against something that is metal.

Startup your recoil and watch for a spark to appear, if the spark is not lighting or your not sure then it might be worth replacing your spark plug to see if this fixes the issue.

Stale Fuel/Wrong Fuel

Over the winter months, your lawnmower should have been drained of fuel from the previous use, if not then you might have bad and old fuel causing problems within your lawnmower.

Try getting rid of any old fuel with an extractor if this is the case.

Also ensure your machine is filled with the right type of gas and is not mixed with oil, as well as ensuring the fuel tap on your model is switched on so as fuel can flow to the carburettor freely and start your machine.

Check Your Carburettor Has Fuel

As we mentioned above, if you have any issue relating to fuel reaching your Carburettor then you might have the reason as to why your mower is not starting.

Most mowers either have a bowl or red primer bulb on the side. To check if your mower has fuel with a red primer bulb simply unscrew the air filter on your machine and press the primer bulb to see if any fuel is being pumped into the engine.

For the bowl carburettor simply undo the drain plug at the bottom and see if fuel flows out, if you see fuel flow out of fuel being pumped to your carburettor then your mower has no issue with supplying fuel there.

Look for Blade Obstruction

Raise your mower on some cinder blocks or remove the spark plug and tip the mower so as the exhaust is facing down and the carburettor is up so as you can get a view of the blades underneath.

With time, obstructions such as grass and debris can get trapped in your mowers blades which may prevent them from turning and stop the engine of your machine starting if the blades are not getting any movement.

Check underneath for anything unusual like this and clean the under of your mower with a screwdriver or knife, if you clean with water take care to not get any electrics wet.

Check The Lawn Mower Choke

Ensure the choke of your mower is set to start so as it can choke the air in the valve of your mower and help it start.

To check if a manual choke is working you can remove the air filter of your mower and look through to the carb, then operate the throttle and watch to see if the valve is closed.

If your valve is not closing you may have to loosen the cable below the carb and reposition it, this can often be caused if something has nested around there while your mower was stored in the winter.

The Battery Is Worn Out

With time, if you are using a battery lawnmower, these batteries can become worn out and flat from not be charged after the winter months. Try a new battery in your mower to see if this the issue.

Other Reasons As To Why Your Lawnmower Isn't Starting

If you have tried all of the above and your mower still will not start after winter then you might have some other less common issues occurring with your mower.

Some problems such as your lawnmower starting then dying after a couple of minutes, or running too hot may be among the problems happening.

We have put together a few more troubleshooting ideas below to help you out.

There Is a Split Primer Bulb

If you have stored your mower outside during the winter where it is cold then you could easily have a split primer bulb. This could be a reason as to why your mower isn't starting so you should get replaced immediately.

It's The Kill Switch/Micro Switch

Depending on the type of mower you have your model will have a kill switch or microswitch.

The kill switch on a mower has to disengage for your mower to get a spark and start running, however, if anything has obstructed the kill switch or there is a disconnection then you might have an issue.

To get a closer look at the kill switch you can remove the cover of the cable that runs from the safety lever to the kill switch and operate the lever to see if the switch disengages, if it does not then you know there's a problem.

For a microswitch, this switch has to be activated for it to work from the safety lever, follow the same steps above to check and listen out for a click to see if this type of switch is working.

Your Mower Is Hydrolocked

If your lawnmower was tipped in an upright position when stored then it could potentially be hydro locked.

When hydro locked, a mower will feel difficult to pull over, to fix this try removing the spark plug and pulling the lawnmower to start it a couple of times, then reattach the spark plug and see if your mower is working.

Check The Cooling Fins

Nests can appear over the winter months and be a reason for your lawnmower starting then cutting out.

Remove the starter recoil of your mower and blow to clean any cooling fins on your mower, you should also change the spark plug if this was your issue.

There Is White Smoke

Tipping your lawnmower the wrong way during storage in winter can be a common culprit of white smoke.

White smoke is most of the time not an issue and is just the result of the oil in the mower reaching the wrong places and causing the smoke, you can fix this by running your mower till all the smoke has disappeared.

How To Winterize Your Lawnmower

Now you have looked at all the troubleshooting problems above and hopefully determined what the issue is with your mower, we have put together some tips on how to prepare your mower for winter storage in the future and avoid any preventable issues from when you take it out for the new season.

  • Put stabilised fuel - Fuel stabiliser can allow you to keep your lawnmowers tank full of fuel during winter without any issues such as stale fuel clogging your engine. Having a full tank can also stop rust from forming and clogging your mowers carb.
  • Clean the mower - Completely clean your mower before storing and remove any debris or grass that is trapped beneath. Always remove the spark plug before hosing your mower down.
  • Take out the battery - If your mower uses a battery then you should detach it from your model and take it off for storage separately.

Frequently Asked Questions About Lawnmowers Start-Up Problems After Winter

Why is it an issue to leave gas in your mower over winter?

Leaving fuel in your mower over winter can clog up your carb and cause rust in your mower, both problems can cause startup issues with your mower.

How do I clean my mower?

You can clean your mower by using a screwdriver to remove any stuck debris and hosing it down afterwards, always disconnect the spark plug before doing this to prevent accidental start-up and remove any electricals.

Should I change the air filter on my lawnmower?

Yes, a bad air filter can stop the fuel in your mower from burning properly by stopping the airflow.

To fix this you can replace the paper filter or clean the oil-soaked one depending on your model.

Final Words

Overall, most problems related to your mower not starting after winter are easily fixed with the troubleshooting list above and your model's manual.

To prevent issues from happening when you get your mower out next spring, you should always make sure you are winterizing your lawn mower before storing it away for long periods in the future.

Do Lawn Mowers Have Alternators? Find Out Here!

What Kind Of Lawnmower Has An Alternator?

Depending on the kind of mower you have, your model might have an alternator. Alternators are used in the powerful engines of mowers to help spin the blades and cut grass.

To narrow it down, only riding mowers have alternators and push/petrol-powered mowers don't. This is due to the fact riding mowers require more engine power than other mowers because of there size and the large area of ground they cover when in use. 

To find out where these alternators are in your riding lawnmower and how they work, we have put together a little guide below to teach you everything you need to know about your lawnmowers alternator.

What Is The Role Of An Alternator In a Lawnmower?

As we touched on above briefly, the role of an alternator in a riding lawnmower is to power its battery to help the powerful engine operate.

This is similar to a car and keeps the battery charged, being spun by another belt separate to the blade belt on your mower generating energy to charge the battery of the mower.

The alternator of your mower is extremely important and can be responsible if your mower is starting to lack in power, meaning it might need to be fixed to see if its in a good condition.

How Do Other Types Of Mowers Work?

Regular human force push mowers don't use an alternator as they don't need a battery or even fuel to operate. Instead, this mower is powered by the motion of you pushing the mower on to the grass and the cylinder grabbing it and holding it against the stationary blade on your mower.

These mowers tend to be very affordable and not noisy due to the way they operate.

Petrol mowers on the other hand also do not have an alternator as they use fuel to power there engine instead and electric mowers use a rechargeable battery which doesn't require an alternator as the doesn't use as much energy from their motor in comparison to a riding model.

Where Do I Find The Alternator On My Mower?

The alternator of your riding mower should be located under the flywheel of your engine. The engine is located under the hood of your mower, and under the engine cover which is located underneath, you will find the flywheel.

The alternator will be in a circle shape that has a hole in the middle like a doughnut, you will have to remove the flywheel first to access it.

How Can I Check My Mowers Alternator?

If your battery keeps cutting out on your mower or going dead when you aren't even using your mower, the alternator could be to blame.

They also tend to be blamed if your mower suddenly cuts out or the battery keeps losing charge over and again quickly despite giving it a full charge beforehand.

We have listed out a couple of ways to check your mowers alternator below to help you figure out the issue.

Test The Headlights

One of the ways you can check if your alternator is working is by turning on the headlights of your mower while it is running.

When your engine is running, that's when you can cut it with the lights on and see the headlights dim themselves, if they don't then you have a bad alternator.

Look At It Under The Flywheel

Remove the flywheel and have a look at your alternator to make sure everything is working fine.

For fixed alternators, you might notice burnt out coils which could be contributing to an uneven charge on your mower and for non-fixed alternators uneven wear or mounting that's causing the alternator to spin in the wrong way.

Test With a Multimeter

If you are not confident with your findings in both steps above then it might be best to test your alternator with a multimeter.

First, find your mower's battery and connect the black wire of your multimeter to the + terminal on your mower's battery, make sure the other end is connected to the COM port on your device.

Then, take the red wire of your multimeter and connect it to the AMP port. After making sure both wires are connected you can turn the mower on full power for a couple of minutes and note down your findings, then compare this with your manufactures recommended findings to see if there is an issue.

A lower reading than recommended will indicate there is an issue with the alternator.

Frequently Asked Questions About Lawnmowers Alternators

Do lawnmowers have a charging system? 

Yes, this is essentially the alternator, as the belt turns the alternator then charges the battery.

How do I know if there is an issue with my alternator?

As we mentioned above, battery issues such as quick loss of charge without using your mower can indicate a bad alternator, the best way to determine if there is an issue is by using a multimeter to look at the voltage readings.

Why don't smaller lawnmowers need an alternator?

Smaller lawnmowers do not have components such as headlights, starters and electric clutches, riding mowers, on the other hand, have all these and more so need a battery to run and cover large areas too.

Is there another kind of charging system for tractor lawnmowers?

Yes, riding lawnmowers either charge themselves with a belt-driven alternator or a stator alternator depending on the model you buy.

What is a multimeter?

A multimeter is a handheld device that you can buy which displays the voltage and current of what it's connected to. This device is the best way to determine if your alternator is not producing enough power.

Final Words

Overall, you will only find alternators on big tractor style riding lawnmowers that require this kind of power for the engine and battery to function.

The best way to figure out if there is a problem with your alternator is by using a multimeter and seeing if your findings are low or not typical of your mower's model.